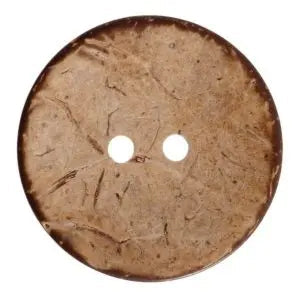
How coconut buttons are made is a question more designers ask the moment they hold one. It is light, warm, uniquely patterned and looks as though it came straight from nature. Behind that simple look, though, is a production chain that explains why coconut buttons are rarely more than a few millimetres thick, why each one is different and why they dislike soaking. This article does not compare coconut with other materials; instead it follows its path step by step – from palm to garment – and what each step means for your specification.
The raw material: a by-product, not a dedicated crop
Coconut buttons are made from the hard inner shell of the nut – the layer between the fibrous outer husk and the white flesh. Palms are not grown for buttons: the nuts are harvested for food – coconut flesh, milk, oil, desiccated coconut – and the shell is left over. Much of it is burned as fuel or turned into charcoal. Used for buttons, it gets a far longer life. The shell is a natural, renewable, biodegradable material and is obtained without chemical processing.
The leading coconut growers – the Philippines, Indonesia, India, Sri Lanka and Vietnam – are also the centres of coconut button production.


The process step by step
1. Separating and cleaning
Once the flesh has been removed, the shell is separated from the fibrous husk (which goes on to become coir) and cleaned of any remaining flesh. The clean shell is then broken into larger pieces.
2. Drying
The pieces are dried – often in the sun – until the moisture content is low enough. This step is critical: under-dried shell cracks or goes mouldy later, while drying too fast builds internal stress.
3. Cutting blanks
A tube cutter (a hollow drill) cuts round discs from the pieces. This is where the first big limitation appears: the shell is curved. The larger the disc, the more the curve comes into play and the more material has to be ground away to make it flat. That is why most coconut buttons fall roughly in the 10–25 mm range and very large sizes are rare.
4. Flattening the back
The discs are ground on the inner side to give a flat back and even thickness. The shell itself is only a few millimetres thick, so a finished button is usually 2.5–4 mm. Thicker coconut buttons are practically never made from a single piece.
5. Shaping the profile
The face is shaped on a lathe or CNC machine: rim, dish, domed or flat profile. Because the material is thin, profiles are shallower than on corozo or polyester.
6. Drilling the holes
Two or four holes are drilled, and some designs get a shank instead. The edges of the holes are smoothed so they do not cut the thread.
7. Sanding and polishing
The buttons are tumbled in barrels with abrasive, then with wood chips and wax, until the surface is smooth. This is also the stage that removes burrs and sharp edges.
8. Finishing
The final step defines the look. The options are set out in the table below.
The two faces of the shell
The shell has an outer and an inner surface, and they look different. The outer one is darker, with a fine texture and characteristic specks and fibres; the inner one is smoother. The maker decides which stays visible. "Bark" designs keep the natural outer surface and are the most rustic. Polished designs show the dense structure of the shell with a soft sheen.
Where defects come from
Knowing the process also helps at goods-in. Cracks usually follow the natural structure of the shell and result from poor drying or from spots ground too thin. Burrs in the holes point to insufficient polishing. Uneven thickness comes from the curve of the blank – if the back has not been fully flattened, the button rocks on the fabric. Spots and darker patches are usually not defects but natural marks of the shell. When ordering, agree with your supplier what counts as natural variation, and check a few buttons with calipers and a fingernail around the holes.
Finishes and what they give you
| Finish | Look | Good for | Watch out for |
|---|---|---|---|
| Natural (raw) | Matte, natural texture | Linen, cotton, eco ranges | More sensitive to moisture |
| Polished/waxed | Soft satin sheen | Shirts, dresses, cardigans | Wax wears off with washing |
| Lacquered | Glossy, richer colour | Coats, dressier garments | Lacquer can scratch |
| Bleached or dyed | Lighter or coloured tone | Fashion colour stories | Colour varies from button to button |
| Laser engraved | Pattern or logo in a darker tone | Brands, decorative designs | Fine detail needs a larger size |
What the process means for your specification
- Size and thickness are limited by nature. If the design calls for a 35 mm button 5 mm thick, coconut is probably the wrong material – consider corozo, wood or polyester.
- Variation is part of the product. Colour and pattern vary between buttons and between lots. Order the quantity for the whole collection in one go and approve a sample from the actual lot.
- The material absorbs water. Coconut contains plant fibre and takes up moisture. Choose a polished or lacquered finish for garments that are washed often, and avoid prolonged soaking.
- Thin buttons need an accurate buttonhole. At 2.5–3 mm thick, a buttonhole cut for a chunky button will be too loose.
- Lasers love coconut. The dark mark left by a laser shows up clearly on pale coconut, which makes logo engraving a natural fit.
Tip: coconut buttons are popular for childrenswear because they are light and natural, but since they are thin, check the sewing strength and avoid very small sizes for babies.
The Bul-tex coconut buttons collection includes two- and four-hole designs in 9 mm for shirts, 15 mm for general garments and 25 mm for coats, plus a laser-engraved option. For a comparison with other natural materials, browse our natural buttons or the Buttons section of the blog. For logo coconut buttons and production quantities, drop us a line.