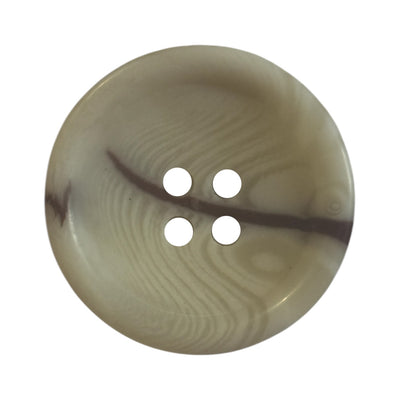
Lockstitch vs chainstitch button sewing is one of the first decisions a small factory or atelier faces when volumes grow and a dedicated button machine becomes worth buying. Sewing buttons by hand on 200 shirts takes a full day; on a machine the same job takes an hour or two. But the choice between the two stitch types isn't only about speed. It decides whether a button stays put through hundreds of washes or falls off the first time someone tugs a loose thread. This article explains how both machines work, what stitch counts mean, and how to check the result with a pull test.
How a button machine works
- Positioning. The button sits in a clamp that holds it against the fabric. Automatic models feed buttons from a vibrating hopper.
- Stitch cycle. The needle moves only up and down, while the clamp shifts the button left, right, forwards and back so the needle enters each hole in turn.
- Tacking. At the end of the cycle the machine adds a few locking stitches so the seam won't unravel.
- Trimming. The thread is cut automatically and the machine stops, ready for the next button.
The whole cycle takes about a second. The programme sets the number of stitches, the hole sequence (parallel "=" or crossed "X" on four-hole buttons) and whether a tack is added.
 Sewing thread red No. 80
 SHELL 18 WHITE – 4-hole white river shell buttons for men's shirts, natural and designer
 Mother-of-pearl star-shaped buttons AG0004
Single-thread chainstitch
Classic chainstitch button machines use a single thread and no bobbin. Underneath, a looper catches the thread and forms a chain of loops. The advantages are clear: no bobbins to change, fewer stops and higher output. That's why chainstitch is typical in mass production of shirts and T-shirts.
The weakness is equally clear: if the end of the chain isn't secured, pulling the thread on the back can unravel the whole seam. The button doesn't break, it simply drops off. Modern machines solve this with tacking programmes and an end knot, but with worn settings the risk remains.
Two-thread lockstitch
Lockstitch uses a top thread and a bobbin thread. The two threads interlock inside the fabric, just like on an ordinary sewing machine. The result is a seam that doesn't unravel if one stitch breaks, because every stitch is locked on its own. The trade-off is lower output: bobbins need changing and the machine is slightly slower.
Side-by-side comparison
| Criterion | Chainstitch (1 thread) | Lockstitch (2 threads) |
|---|---|---|
| Speed | Higher | Lower |
| Bobbin changes | None | Yes |
| Unravelling risk | Yes, if the end isn't secured | Minimal |
| Thread consumption | Higher | Lower |
| Underside | Chain of loops | Flat stitches |
| Typical use | Shirts, T-shirts, mass runs | Coats, workwear, childrenswear |
How many stitches per button
Machines typically run programmes of 8, 16 or 32 stitches per cycle. Practical guidelines:
- Two holes, light shirt: 8–12 stitches.
- Four holes, shirt or blouse: 16 stitches (8 per pair of holes).
- Four holes, jacket, coat, workwear: 16–32 stitches plus a tack.
- Shank buttons: need special clamps; on heavy garments they are often sewn by hand.
More isn't always better. Too many stitches overload the button's holes and can cut the fabric, and on thin shell buttons a needle striking the edge of a hole can crack the button.
The thread shank
On thick fabrics a button needs a shank, a few millimetres of thread between button and cloth that leaves room for the other layer when buttoned. Some machines create a shank by raising the clamp; otherwise it is wrapped on a separate machine or by hand. Without a shank the button pulls and the thread wears through quickly.
How the stitch type affects pull tests
A pull test measures how much force a sewn button withstands before it comes off. Many retailers' requirements for childrenswear specify around 90 N held for 10 seconds. Three things can fail: the thread, the button (its holes) and the fabric.
- Lockstitch generally gives more consistent results because the seam can't unwind.
- Chainstitch passes when the end tack is right, but it's more sensitive to settings.
- When the button itself is very strong, stitch count and thread thickness matter more than stitch type.
Tip for ateliers: pull test five buttons from every new fabric, button and thread combination before starting a run. Record the machine settings so you can repeat them on the next order.
Common problems and fixes
- Buttons falling off after washing: check the end tack on chainstitch and the thread tension.
- Buttons breaking on the machine: the needle is hitting the edge of a hole; check clamp centring and that the button size matches the programme.
- Thread snapping mid-cycle: a needle too fine for the thread, or sharp edges in the button holes.
- Puckered fabric under the button: tension too high, or too many stitches for a light fabric.
- Button sewn on crooked: the clamp isn't holding the button flat; clean it and check for wear.
Choosing thread and buttons
- Thread: button attaching uses a heavier thread than seaming. Polyester thread No. 80 is stronger than No. 120 and a sensible choice for buttons on medium and heavy fabrics.
- Buttons: for automatic attaching, consistent sizes and evenly drilled holes are critical. Polyester and urea buttons are the most predictable; natural materials need more careful clamp settings.
- Shell: reduce speed and check centring so the needle never strikes the edge of a hole.
Bul-tex offers sewing threads in No. 80 and No. 120 in core colours, plus polyester buttons and shirt buttons suited to machine attaching. If you are preparing a production run and need buttons in volume, get in touch. More manufacturing topics are in our production articles.