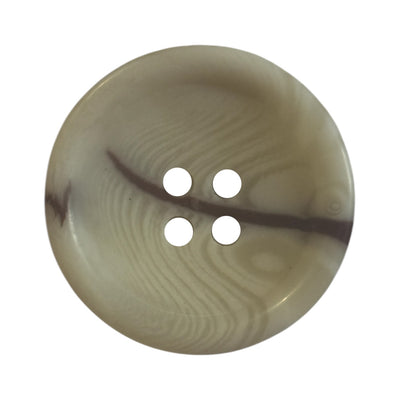
Knowing how to identify button material is useful for vintage sellers, tailors hunting for a replacement and brands checking a supplier's sample. The good news is that most materials can be identified without a lab, using just your hands, your eyes and a loupe. This guide orders the tests from the safest to the riskier ones, then gives a short profile of each material so you can compare what you find.
Step 1: Look at the pattern and surface
Examine the button in daylight and, if you have one, under a 10x loupe.
- Iridescence that shifts as you turn it: probably shell. Imitations with pearlescent pigment shimmer too, but the effect is flatter and changes less.
- Fine, irregular lines like wood, but without growth rings: corozo. No two tagua seeds are identical, so each button has a unique grain.
- A fibrous, dark brown surface with tiny specks: coconut.
- Clear growth rings and grain: wood.
- The same pattern repeated across several buttons: polyester or urea.
- Vintage background: horn shows natural lengthwise streaks, while bone shows speckles and tiny channels, especially after dyeing.
 Dark grey corozo buttons CB5001 with 4 holes
 Polyester buttons PPB 0022
 Mother-of-pearl buttons River 02
Step 2: Weight and temperature
Hold the button in your palm, or touch it to your lips, an old but reliable trick.
- Cold and heavy: shell, metal or glass.
- Cool and dense, but not cold: corozo, coconut.
- Warm and light: polyester, wood.
- Neutral, slightly heavier than polyester: urea.
Real shell feels cold and stays cold for a few seconds. Plastic warms up almost instantly.
Step 3: Sound
Tap two buttons together, or tap the button against a tooth. Real shell gives a sharp, high click. Corozo and coconut sound hard but duller. Polyester gives a soft, plasticky sound, and wood a muted thud.
Step 4: Back, edge and holes
- Shell: the back is often more matt or shows traces of the outer shell layer, sometimes in a different colour. Layers are visible at the edge.
- Corozo: part of the nut's brown outer skin may show on the back. Holes are drilled and slightly matt inside.
- Coconut: the back is often lighter and fibrous.
- Polyester: the back looks like the front, with the same colour and gloss. Moulded buttons may show a small gate mark.
- Metal: the back shows a shank or a pierced plate; a magnet hints whether it's steel (magnetic) or brass and zinc alloy (non-magnetic).
Step 5: UV light (optional)
Under ultraviolet light many natural materials, shell included, fluoresce with a soft, uneven glow, while many plastics glow uniformly or not at all. It isn't conclusive, but it helps alongside the other tests.
A word on the hot pin test: touching a heated pin to a button separates plastic (melts, smells chemical) from natural material (smells of burnt hair or wood). It damages the button, so only try it on the back of a spare, never on a valuable vintage piece.
Material profiles
| Material | Look | Feel | Sound | Giveaway |
|---|---|---|---|---|
| Shell | Iridescent, layered | Cold, heavy | Sharp | Lustre shifts when turned |
| Corozo | Matt, fine lines | Cool, dense | Hard | Unique grain, sometimes skin on the back |
| Coconut | Brown, fibrous | Cool | Hard | Specks and fibres |
| Wood | Growth rings | Warm, light | Dull | Visible grain |
| Metal | Metallic sheen | Cold, heavy | Ringing | Shank, possibly magnetic |
| Polyester | Anything, repeating | Warm, light | Soft | Identical buttons in a set |
| Urea | Matt or semi-gloss | Neutral | Hard | Won't melt under a hot pin |
| Glass | Clear or glossy | Cold | Ringing | Very smooth, sometimes bubbles |
| Casein (vintage) | Matt, rich colour | Neutral | Soft | Smells of milk under a hot pin |
Horn and bone are background only: horn is warm with natural streaks and translucent at the edge; bone is more brittle, with specks and small channels.
Common traps
- Dyed corozo vs polyester: corozo takes dye unevenly, so the grain shows through the colour.
- Shell vs pearlescent polyester: real shell is cold and rings, and its back is rarely perfect.
- Coconut vs wood: coconut is harder and heavier, with no growth rings.
- Urea vs polyester: they look similar; urea is heavier and harder and survives a hot iron.
Why it matters
For vintage sales, the material affects price and listing accuracy. For a replacement, it decides whether the new button will match in lustre and weight. For brands, identification is part of incoming quality control: does the sample match the specification?
Once you know the material: finding a replacement
- Measure the diameter in millimetres with calipers. Catalogues often use lignes (L) too: one ligne is about 0.635 mm, so 18L is roughly 11.4 mm, 24L about 15 mm and 32L about 20 mm.
- Count the holes, two or four, or check whether it's a shank button.
- Measure the thickness. A 1 mm difference is obvious in the buttonhole.
- Note the shape: flat, raised rim, dished centre or domed.
- Compare in daylight against the fabric, not on a screen; colours in photos are rarely accurate.
If you can't find an exact match, replace the whole visible set. One odd button on the front stands out more than a completely new but consistent set.
Record the material in your spec
For brands, the best prevention is a clear specification: material, diameter in mm or lignes, number of holes, thickness, colour and finish. Then a repeat order needs no loupe-and-pin detective work, and the supplier knows exactly what to offer.
If you are looking for a replacement, compare it with the styles in Bul-tex natural buttons, corozo buttons and coconut buttons, as well as our polyester buttons. If you need a larger quantity matched to a sample, get in touch. More shell-specific tests are in our button articles.