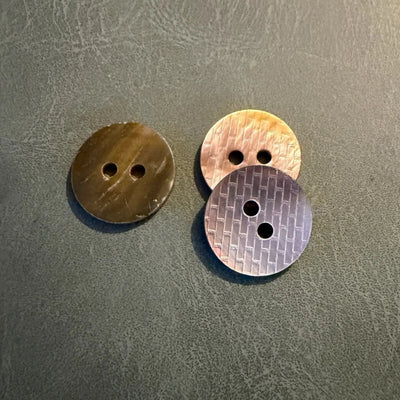
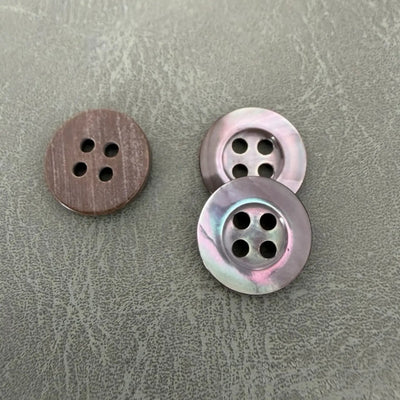
Knowing how to clean vintage buttons sounds trivial – a bit of water, a bit of soap, done. Yet exactly that approach ruins more vintage buttons than anything else. Horn, shell and wood are natural materials with very different chemistry: one absorbs water and warps, another dissolves in acid, a third loses its colour. Whether you have inherited your grandmother's button tin, bought a vintage coat or are upcycling an old garment into something new, here is how to clean and refresh buttons without damaging them.
First: identify the material
The cleaning method depends entirely on the material, and button collectors agree that identification always comes first. A few quick pointers:
- Horn – warm to the touch, with irregular streaks and tones, slightly translucent at the edge when held to the light.
- Shell – cold to the touch, heavy for its size, with an iridescent sheen; the back is often duller and shows layers.
- Wood – light, warm, with visible growth rings or grain.
- Corozo – looks a bit like bone, with fine grain lines, often dyed.
- Early plastics (celluloid, Bakelite, casein) – a category of their own, covered further down.
Rule number one: test any method on a single button, ideally on its back, before you clean the whole set.
 Dark blue corozo buttons CB5001 with 4 holes
 SHELL 09 SMOKE / GRAY – Trocas mother-of-pearl buttons with double thin rim, designer buttons for men's shirts
 SHELL 03 WHITE – Luxurious square Trocas mother-of-pearl shank buttons, designer for men's and women's clothing
Horn buttons
Horn is keratin – the same protein as fingernails and hair. It absorbs moisture, so prolonged soaking makes it swell, warp or delaminate.
- Brush off dust with a soft brush (an old soft toothbrush or a make-up brush).
- If there is grime, dampen a cloth in lukewarm water with a drop of mild soap, wring it out well and wipe the button. Do not immerse it.
- Dry straight away.
- Put the tiniest amount of oil (cooking oil or mineral oil) on a tissue and rub the button. The oil cleans and seals the surface at the same time, bringing back the depth of colour.
- Leave it for a few minutes, then wipe off the excess.
Shell buttons
Mother-of-pearl is calcium carbonate laid down in thin layers held together by an organic binder. Its two worst enemies are acid and dryness.
- Brush away the dust.
- Wash briefly in lukewarm water with a mild, neutral soap – seconds, not minutes – and rinse.
- Dry immediately with a soft cloth.
- If the lustre has been dulled by detergent residue, rub in a drop of baby oil with a soft cloth. Shell often comes back to life instantly.
Never use vinegar, citric acid or descaler – they literally dissolve shell and leave dull patches.
Wood buttons
Wood is the most sensitive to water: it swells, cracks and loses its stain. So with wood, water is barely used at all.
- Brush out dust and dirt from the holes.
- For stubborn marks, wipe gently with a barely damp cloth and dry at once.
- Apply a thin layer of beeswax or wood paste with a cloth, let it soak in and buff to a soft sheen.
- If the wood is very dry, a drop of linseed oil also helps – but let it dry completely before sewing the button onto a garment.
Quick reference table
| Material | Cleaning | Conditioning | Never |
|---|---|---|---|
| Horn | Brush, barely damp cloth | A drop of oil | Soaking, hot water |
| Shell | Brief wash with mild soap | Baby oil | Vinegar, acids, bleach |
| Wood | Dry, brush | Beeswax | Soaking, drying on a radiator |
| Corozo | Brush, barely damp cloth | A drop of oil | Soaking, solvents |
| Early plastics | Dry only | Nothing | Acetone, solvents, sealed plastic bags |
Seven things you should never do
- Ammonia and bleach – they discolour horn and wood and can break down early plastics.
- Overnight soaking – the most common mistake; natural materials take up water.
- The dishwasher, or the washing machine without a garment – knocks and heat crack buttons.
- Ultrasonic jewellery cleaners – they can delaminate shell and crack horn.
- Abrasive pastes – they strip the polish and leave scratches.
- Acetone – it dissolves celluloid and many lacquers.
- Drying on a radiator or with a hairdryer – rapid swings in heat and moisture crack natural materials.
A special case: early plastics
Many vintage buttons that look like horn or tortoiseshell are actually celluloid, casein or Bakelite. Over time celluloid can break down, give off an odour and "infect" neighbouring buttons. Clean it dry only and store it separately in a ventilated place. Casein is made from milk and does not like water. If you are not sure what a button is made of, the safest choice is to stick to a soft brush.
Restoration: knowing when to stop
Light scratches on horn and corozo can sometimes be softened with a very fine polishing cloth and wax, but deep cracks cannot be fixed. A cracked button will snap the first time it is pulled hard, so keep it for decoration and choose a new one for a working closure. A missing button in a set can usually be solved in one of two ways: move the surviving buttons to the visible positions (the front, for instance) and replace the lowest one or the cuffs with new buttons in a close shade, or replace the whole set.
Storage
- Keep buttons in compartment boxes or cotton pouches, sorted by material.
- Avoid sealed plastic bags for early plastics – trapped gases speed up degradation.
- Keep them out of direct sunlight, which bleaches horn and wood.
- A stable room temperature and moderate humidity – no basements or lofts.
If you are restoring or upcycling a garment and a button is missing, the Bul-tex natural buttons collection has shell, corozo and coconut designs, and our wooden buttons collection covers wood. For more on caring for buttons in the wash and at the dry cleaner, see our Buttons section. Cannot find the right match? Send us a photo and the size.