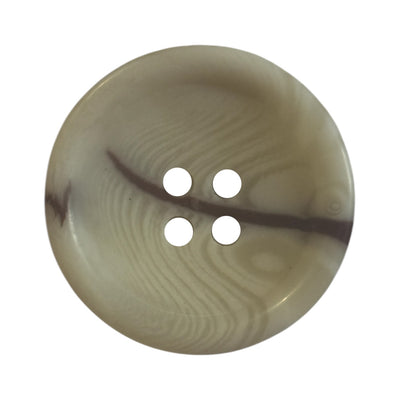
The button polishing process is a step you rarely see but feel immediately. It decides whether a button is smooth and warm to the touch, whether the rim scratches your fingers, and whether the thread in the holes frays after a dozen washes. At the Japanese button maker Iris, for example, buttons are polished for about 15 hours and then for roughly another 15 hours with wax and finishing agents: 30 hours in total. Why so long, and what actually happens inside the barrel? Here is the process step by step.
Why a button needs polishing at all
After turning and drilling, every button, whether corozo, shell, polyester or wood, carries tool marks: fine concentric lines, sharp edges and burrs around the holes. Polishing thousands of buttons by hand is impossible. So the industry uses mass barrel polishing: the buttons tumble for hours with an abrasive medium that gradually smooths every surface at once, including the face, back, rim and the inside of the holes.


The process step by step
- Sorting and loading. Buttons are sorted by size and material. The barrel (a rotating octagonal or hexagonal drum, or a vibratory bowl) is filled to about half. Overfilled, there is too little movement; underfilled, the buttons knock into each other and chip.
- Wet coarse polishing. Water and an abrasive medium are added, most often wood chips or cubes, pumice, ceramic media and sometimes crushed walnut shell. This is the longest phase: over many hours the medium removes lathe marks and rounds the edges.
- Flushing. The abrasive and fine particles are rinsed away so they do not scratch during the next stage.
- Dewatering and drying. The water is removed. For plant materials such as corozo and wood this is critical, because too much contact with water causes swelling and micro-cracks.
- Oil or wax treatment. In a second barrel filled with soft wooden media, wax and finishing agents are added. The wax fills microscopic irregularities and builds the shine; the longer the run, the deeper the gloss.
- De-oiling. Residue is removed so the buttons do not mark the fabric or attract dust.
- Inspection. Buttons are checked for scratches, chipped rims, rough holes and uneven gloss.
Why 15 plus 15 hours
The timing is not arbitrary. Abrasive polishing has to be slow so it does not eat into the shape; a 20 mm button with a crisp rim can lose its profile if the medium is too aggressive. Wax polishing is slow too, because shine builds up gradually. Cutting the cycle short is one of the easiest ways to save cost, and it shows straight away: patchy dull areas, a rim you can feel and holes that stay sharp.
Different materials need different settings. Polyester is relatively soft and polishes faster. Corozo is dense and hard but sensitive to water, so the wet phase is carefully limited. Shell is very hard, and makers often combine mechanical polishing with a brief chemical treatment for lustre.
Gloss or matte: decided in the barrel
The same corozo or polyester blank can come out mirror-bright or velvety matte, depending on how it is polished:
- High gloss: a full wax cycle; strong reflection that intensifies colour.
- Semi-matte (satin): a shorter wax run; a soft sheen that is very much in fashion for 2025–2026.
- Matte: abrasive phase only, without wax, or with additional sandblasting; it reveals the texture of the material.
Bear in mind that a matte button must still go through abrasive polishing. Matte does not mean unfinished. A matte button with sharp holes is simply a bad button.
The holes: a small detail that matters
Thread passes through the holes with every fastening and every wash. If a hole has a sharp edge, it acts like a blade: the thread wears through and the button falls off. A well-polished button has slightly rounded, smooth hole entries. The check is easy: pass a thread through a hole and rub it back and forth. You should not feel it catch.
Troubleshooting: what a defect tells you
| Defect | Likely cause |
|---|---|
| Dull patches on a gloss button | shortened wax polishing or contaminated media |
| Chipped rim | too few buttons in the barrel or too high a speed |
| Sharp holes, frayed thread | insufficient abrasive phase |
| White haze | wax residue or poor rinsing |
| Micro-cracks in corozo | too long in water, drying too fast |
| Different shine between batches | different cycle time or worn media |
Tip: for production orders, approve a sample and keep one button as your reference. When the next batch arrives, compare its shine and rim against that reference, not against memory.
How to check polishing when goods arrive
You do not need a laboratory. Five minutes and a few buttons taken from different parts of the carton are enough:
- Look at an angle. Tilt the button towards a lamp. A gloss button should reflect evenly, with no dull patches or concentric lathe marks.
- Fingernail test. Run a fingernail over the rim and the back. There should be no burrs, ridges or rough areas.
- Hole test. Pass a thread through and rub it 20–30 times. If it frays, the holes are not rounded enough.
- White cloth test. Rub the button on a white cotton cloth. Wax or dye residue shows up immediately.
- Compare with the reference. Place a new button next to the approved one in daylight.
If in doubt, sew a few buttons onto a fabric offcut and wash it at the care-label temperature. One wash tells you more than ten photos.
What to ask your supplier for
- a clear description of the finish: gloss, semi-matte or matte;
- a sample from the production batch, not from old stock;
- a check of the holes with your own thread and needle;
- for natural materials, whether wax or lacquer was used, if you sell the product as vegan.
Bul-tex manufactures and supplies buttons for brands and ateliers, from natural buttons in shell, corozo, wood and coconut to polyester buttons in gloss and matte versions. If you need a specific finish for a collection, contact us. You will find more on how trims are made in our Manufacturing section.