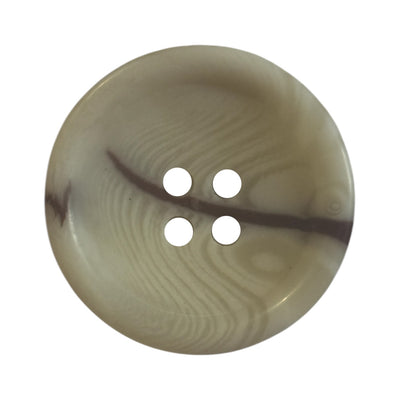
Why do buttons break in the wash? It is one of those small annoyances that keeps coming back: you pull out a shirt and find half a button, or just the thread. Most people blame the button, but the real cause is usually a mix of mechanical impact, a high spin speed, heat and a material that doesn't suit the way the garment is washed. This article works through the causes like a diagnosis, symptom by symptom, and ends with advice for brands that want their buttons to survive.
Diagnosis: symptom, cause, fix
| Symptom | Likely cause | Fix |
|---|---|---|
| Button split in two | Impact against the drum or a metal part at high spin | Lower spin, garment inside out, laundry bag |
| Chip off the rim | Brittle material (shell, thin coconut) or zips in the same load | Close zips, wash separately or by hand |
| Crack with no obvious knock | Heat from the dryer or iron | Skip the dryer, iron around the button |
| Wood cracked and rough | Soaking followed by fast drying | Short wash, dry in the shade |
| Button intact but missing | Worn thread or a chainstitch that unravelled | Resew with strong thread |
| Warped or melted button | Hot iron or press on polyester | Lower temperature, pressing cloth |
 Dark grey corozo buttons CB5001 with 4 holes
 Melange classic polyester buttons PB0106
 Coconut buttons PCTB 0002
The five main causes
1. Drum impact
At 1,200–1,400 rpm, clothes are pinned hard against the drum. A button trapped between fabric and stainless steel takes the full force. Laundry professionals single out drum impact and pressing heat as the main reasons buttons break.
2. Metal hardware in the same load
An open zip, a belt buckle, metal jeans buttons or snaps act like a little hammer. Wash a shirt with your jeans and its shell buttons are genuinely at risk.
3. Heat
Tumble dryers and hot irons are a quiet danger. Shell and thin natural materials crack with sudden temperature changes, and some polyester buttons soften under a very hot press. Urea is the exception: it is a thermoset resin and handles ironing extremely well.
4. A brittle material for the job
Shell is the most fragile of the natural button materials. Large coconut buttons are also better hand-washed because a spin cycle can crush them. That doesn't make these materials bad; it means they aren't right for every garment.
5. How the button was sewn
A button sewn on too tight, with no thread shank, has no give when it's hit and absorbs the whole impact. The single-thread chainstitch used in fast production can unravel if one end is pulled, so the button doesn't break, it simply disappears.
Protecting buttons at home
- Do the buttons up and turn the garment inside out, so buttons sit inside and hit the drum less.
- Close every zip and wash garments with metal hardware separately.
- Use a mesh laundry bag for shirts and blouses with natural buttons.
- Reduce the spin to around 800 rpm for shirts with natural buttons.
- Skip the tumble dryer for garments with shell, wood or coconut buttons.
- Iron around buttons or through a cloth, never directly on top.
- Remove very expensive buttons before washing if the garment allows it.
Quick test: if a button rings when you tap it with a fingernail, it is hard and probably brittle (shell, coconut or corozo). Keep it away from knocks.
What brands can do
Match material to care
- Garments washed often at 40–60 °C (kidswear, workwear, everyday shirts): polyester or urea.
- Premium shirts: shell is the classic, but add "iron around buttons" to the care instructions and avoid the thinnest buttons.
- Coats and jackets: corozo and coconut are hard and durable, and these garments rarely go in a washing machine.
- Summer linen: wood and coconut look right, but 2 mm thickness is a sensible minimum for larger diameters.
Thickness and shape
In the same material, a thicker button is stronger. An 11 mm shirt button around 2 mm thick survives far better than a wafer-thin one. Flat buttons with a raised rim also spread pressure more evenly.
Sewing and checks
Use a lockstitch, or secure the end of a chainstitch, and run a button pull test before production. Include a spare button.
A simple wash test before production
Before ordering thousands of buttons, run a small in-house test that mimics the garment's real life:
- Sew the buttons onto 2–3 samples of the actual fabric, exactly as they will be attached in production.
- Wash the samples five times on the care-label programme, together with jeans or a garment with a metal zip, a realistic worst case.
- After each wash, check for cracks, chipped rims, fading and loose threads.
- Iron the samples as instructed and inspect the buttons near the edge of the iron.
- Record the results and photograph the buttons next to unwashed samples.
If even one button cracks after five washes, change the material, go thicker or adjust the care instructions. The test takes a few days but saves complaints and returns.
When to replace rather than repair
A cracked button will fail completely in the next wash, so replace it straight away. If the broken button is on a shirt placket and you have no spare, move the bottom button, which is tucked into the trousers anyway, into its place and sew a near match at the bottom.
For buttons that cope with frequent washing, browse Bul-tex polyester buttons, including urea shirt buttons. For garments with a natural character, see our corozo buttons and coconut buttons. If you are choosing buttons for a whole collection and aren't sure which material will survive your wash regime, contact us.
A material-by-material washing guide is in our button articles.