A zipper by the yard (continuous zipper, or zip chain by the metre) is a roll of toothed chain that you cut to length, with sliders bought and fitted separately. For upholsterers and makers of bags, covers and tents it is often more flexible than pre-cut zips in fixed lengths. For a workshop sewing trousers and dresses, it rarely pays. This guide explains when it's worth it, how to match chain and slider, and how to assemble a zip yourself.
Pre-cut zip vs zipper by the metre
| Criterion | Pre-cut zip | Chain by the metre + sliders |
|---|---|---|
| Length | Fixed (e.g. 15, 20, 50 cm) | Any length, to the centimetre |
| Types | Closed-end and separating | Closed-end only |
| Fitting time | Minimal | + 2–3 minutes per zip for slider and stops |
| Stock | Many SKUs: every colour × every length | One roll per colour + sliders |
| Waste | Shortening long zips | Almost none |
| Best for | Garment runs, repairs | Bags, upholstery, covers, tents, odd sizes |
One key limitation: you can't make a separating (open-end) zip from continuous chain. The pin and box are pressed on at the factory. For jackets and cardigans you need ready-made separating zips in the right length.
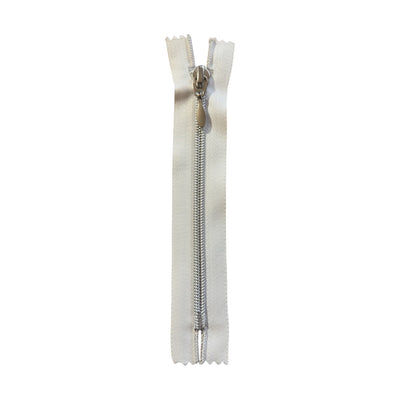
 Coil zipper – White – Non-separable (10 pcs.)
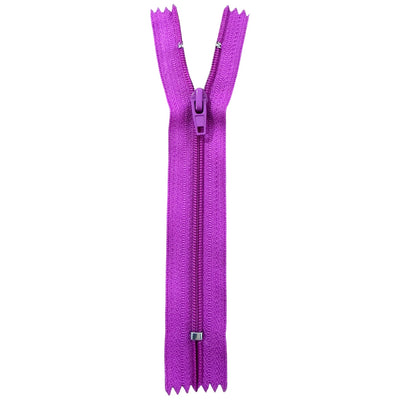
 Purple coil zippers No. 3 TAT TF299 – 11 to 13 cm non-separating
 Metal closed-end zipper brown / silver teeth T5 PMZ0008
Types of continuous chain
- Coil chain – polyester or nylon monofilament, flexible, light and easy to cut with scissors. This is the usual choice for continuous zips: #3 for cushion covers and small pouches, #5 for bags and upholstery, #8–#10 for holdalls and tents.
- Reverse coil – the coil sits on the inside, so only smooth tape shows on the outside. It gives a cleaner look and often comes with a water-repellent coating. It needs a dedicated reverse-coil slider.
- Moulded plastic teeth – less often sold by the metre because the ends are harder to finish.
- Metal chain – available, but you need pliers to remove teeth and metal stops; best left to experienced makers.
Choosing a slider: three rules
- Same chain type. A coil slider won't work on metal or moulded teeth, and vice versa. A reverse-coil slider won't run on standard coil.
- Same gauge. A #5 slider on #5 chain. Even one size out means teeth that don't close, or a zip that splits within days.
- The right mechanism. For bags, often non-lock or double-pull; for furniture covers, auto-lock so they don't creep open; for tents, two sliders.
Tip: the gauge is usually stamped on the back of the slider. If in doubt, measure the width of the closed teeth – 5 mm means #5.
Assembling a zip from chain, step by step
- Cut the chain 3–4 cm longer than the opening; the extra is for threading the slider and for the end seams.
- Separate the two tapes at one end for 2–3 cm.
- Feed both tapes into the slider at the same time from its wide end. The trick is to get them in at exactly the same height; if one leads, the teeth will mesh out of step. Clipping the ends level helps.
- Pull the slider a few centimetres and check the teeth are symmetrical. If not, back it off and try again.
- Make the bottom stop. The simplest way is a bartack (dense zigzag) across the teeth about 1 cm from the end, or simply trapping the end in the seam of the item.
- Make the top stop once the slider is on – again with a bartack, hand stitches through the teeth, or metal stops closed with pliers. Without a top stop, the slider will simply run off.
- Test the action along the full length before sewing the zip in.
For a two-way closed-end zip (on a holdall, say), feed the second slider on from the other end of the chain, facing the opposite way, before fitting the stops.
When zip chain saves money
- Lots of different lengths. If you make cushion covers in 8 sizes and 6 colours, that's 48 SKUs of pre-cut zips – or 6 rolls and one box of sliders.
- Non-standard lengths. Zips longer than 1 m for upholstery, tents and awnings are hard to find ready-made.
- Less waste. No shortening of long zips, no offcuts in the bin.
- Faster turnaround. A one-off cover in an unusual size doesn't wait for a zip in the exact length.
When a pre-cut zip is better
- You're producing a run of the same item with one zip length – pre-cut is faster and has factory-fitted stops.
- The zip is visible and has to look perfect – factory metal stops are neater than a bartack.
- You need a separating zip.
- You're doing repairs – customers expect an original look, not handmade stops.
- It's an invisible zip for a dress or skirt, or a jeans fly, where sizes are standard.
The maths is simple: if what you save in ordering and stock-keeping outweighs 2–3 minutes of extra labour per zip, chain wins. On a run of 500 identical trousers it almost always loses.
How many sliders to order
Sliders get lost, broken and mixed up far more often than chain. A practical rule is to order 10–15% more sliders than the number of zips you plan to assemble, and store them by gauge and type in separate, clearly labelled boxes. If you make two-way zips, count two sliders per item plus the spare margin.
Common mistakes
- Wrong-gauge slider – the number one cause of "a zip that keeps splitting".
- No top stop – the slider comes off the first time it's opened.
- Tapes fed in unevenly – the zip closes crookedly and ripples.
- Too little extra length – nothing to hold on to while threading the slider.
Zippers from Bul-tex
Our zipper collection offers ready-made closed-end #3 coil zips from 10 cm to over 50 cm, T5 metal zips from 20 to 50 cm, and zipper pulls for a finished look. For the hardware around the zip – rings, rivets and stoppers – see our accessories. If you work with continuous chain or need loose sliders for a production run, contact us with the chain type, gauge and quantity and we'll check the options. You'll find more tips in our zipper articles.