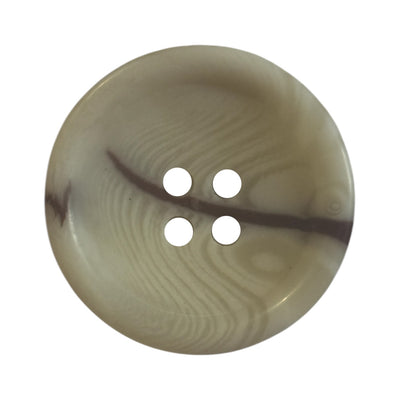
A button colorfastness test usually only comes to mind when something has gone wrong: a white shirt with a pink halo around dark red buttons, a beige coat with brown marks after dry cleaning, or a button that has faded in the sun and no longer matches the cloth. The good news is that these problems can be predicted with laboratory tests from the ISO 105 series — the same ones used for fabrics, with a few adaptations for buttons. This article explains why dyed buttons bleed, which tests apply, how to read the results and what to put in your spec for suppliers.
Why buttons bleed colour
- Surface dyeing. Many buttons — especially natural ones such as corozo and wood — are dyed after shaping. The dye only penetrates the outer layer and, if poorly fixed, comes off in the wash.
- Solvents. In dry cleaning, perchloroethylene and hydrocarbon solvents can dissolve some dyes and lacquers.
- Rubbing. The button rim rubs constantly against the buttonhole; weakly fixed dye transfers to the fabric.
- Light. UV breaks down certain pigments, so the button fades faster than the cloth.
- Perspiration. Cuff and collar buttons are in contact with sweat, which can also draw out dye.
 Yellow Corozo buttons CB5001 with 4 holes
 Melange classic polyester buttons PB0106
 White corozo buttons CB5001 with 4 holes
Which parts of ISO 105 apply to buttons
| Standard | What it tests | When it matters |
|---|---|---|
| ISO 105-C06 | Colour fastness to domestic and commercial laundering | Any washable garment |
| ISO 105-D01 | Colour fastness to dry cleaning with perchloroethylene | Coats, jackets, suits, "P" care label |
| ISO 105-X12 | Colour fastness to rubbing (dry and wet) | Dark buttons on pale fabric |
| ISO 105-B02 | Colour fastness to light (xenon arc) | Summer clothing, shop windows, childrenswear |
| ISO 105-E04 | Colour fastness to perspiration | Shirts, blouses, cuff buttons |
Labs apply ISO 105 not only to fabrics but also to trims such as buttons, bows and embroidery. Details of D01 are on the ISO website.
How buttons are tested
A button isn't a fabric, so the procedure is adapted:
- Preparing the specimen. Buttons are weighed so their mass is about 50% of the mass of the accompanying multifibre fabric.
- The sandwich. Buttons are placed between multifibre fabric (a strip with bands of different fibres — acetate, cotton, polyamide, polyester, acrylic, wool) and polypropylene fabric, and the pack is stitched closed.
- Treatment. The specimen goes through the relevant test — wash liquor with steel balls (C06), solvent (D01), perspiration (E04) — at a set temperature and time.
- Drying. The specimen is dried at no more than 60 °C.
- Assessment. The colour change of the button and the staining of the multifibre are compared against standards.
Grading is done visually in a light booth or instrumentally with a spectrophotometer, which reduces subjectivity. For pearl or melange buttons, an experienced technician's visual assessment is often still more reliable.
For rubbing (X12), a white cotton cloth is rubbed over the button surface, dry and wet, and the colour transferred is then graded.
Reading the results: the grey scale
Grading uses a grey scale from 1 to 5, with half steps (for example 3–4):
- 5 — no change or staining.
- 4 — slight change, usually acceptable.
- 3 — noticeable change; often the pass/fail line.
- 2 — considerable change.
- 1 — severe change.
Two separate grades are given: colour change (the button itself) and staining (each fibre on the multifibre strip). For light (B02), a blue wool scale from 1 to 8 is used. Typical retailer requirements are 4 or 3–4 for washing and dry cleaning, 4 for dry and 3 for wet rubbing, and 4 on the blue wool scale for light — but always check the specific customer's spec.
Tip: the riskiest combination is a dark, intensely dyed button on white or pastel fabric. That is exactly where you should ask for staining grades on cotton and polyester, not just an overall rating.
What to request from your supplier
- State in your spec which tests you need (for example C06 at 40 °C, D01, X12) and the minimum grades.
- Ask for a test report on your colour, not on a "similar" model.
- For buttons dyed to a swatch, agree on testing the first batch.
- For natural materials (corozo, wood), ask how the dye is fixed and whether there is a lacquer.
- Align the care label with the results: if a button fails D01, don't use a perchloroethylene dry-clean symbol.
Materials and typical behaviour
- Polyester: with pigments cast through the mass, colourfastness is very high; with surface dyeing, it depends on the process.
- Corozo: dye sits in the outer layer; good batches survive washing, but dry cleaning is worth checking.
- Wood: without lacquer it can bleed on wet rubbing; sealing is key.
- Natural-colour shell and coconut: undyed, so they practically never bleed.
Frequently asked questions
Do I need to test every button colour separately?
Ideally, yes. Different dyes behave differently — black and white rarely cause trouble, while saturated reds, navies and browns carry the most risk.
How long does a test take?
Usually from a few days to about a week at an accredited lab, depending on how many tests you order. Lightfastness takes the longest.
Can I run a quick check myself?
For an indication, yes. Sew a button onto a white cotton scrap, wash it at the care-label temperature and look for a halo. Rub the button with a damp white cloth too. It won't replace a lab report, but it catches obvious problems.
What if a button fails?
Change the colour or material, ask for extra fixation or a lacquer, or adjust the care label.
Bul-tex supplies polyester buttons and corozo buttons in a wide range of colours, as well as undyed natural buttons. If you're preparing a run with colourfastness requirements, get in touch and we'll talk through materials and documentation. More articles on quality and standards are in our manufacturing section.