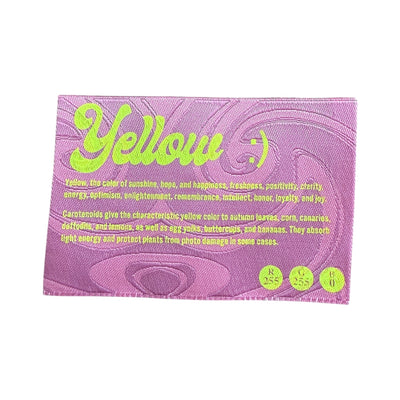
How are woven labels made? Many brands only start wondering when they receive their first quote and see words like "minimum order", "sample" and "lead time". A woven label looks like a small detail, but behind it there's a full production process, from turning a logo into a weaving plan to cutting and folding thousands of identical pieces. Once you understand the stages, it's easier to prepare your artwork, plan your timeline and avoid surprises. Here's the route from artwork to finished label.
Stage 1: Brief and technical decisions
Everything starts with a few decisions that define the label:
- Size: for example 5 x 2 cm for a neck label, 8 x 4 cm for a larger logo.
- Weave: taffeta, satin weave or damask.
- Base colour and number of colours: 2 to 5 colours give the cleanest result.
- Fold: flat, end fold, centre fold or mitre.
- Finish: standard, iron-on adhesive backing or a stiffening backing.
The clearer the brief, the fewer rounds of samples you'll need.
 Woven label 6.5 cm x 4 cm - brand print
 Woven label 7.5 cm x 4 cm - print on fabric
 Woven label 4.5 cm x 3.4 cm - brand logo
Stage 2: Preparing the artwork
Ideally your logo is a vector file (AI, PDF, SVG, EPS). A low-resolution raster image has to be redrawn first, which takes time and risks changes in detail. Text should be converted to outlines so the font can't change. Give your colours as Pantone references; they act as the guide for yarn selection.
Tip: send a photo of the garment or fabric too, so the maker can see what the label needs to match.
Stage 3: Digitising into a weave file
This is the biggest difference from printing. A loom doesn't "see" a picture; it follows a grid of points that decides, at every crossing of warp and weft, which colour comes to the surface. A designer using specialist software converts the logo into this weave matrix, setting the density, the weave structure in each area and how fine lines and curves will appear. Small letters are sometimes thickened slightly and very thin lines widened so they can be woven legibly. This is also when the digital proof is produced for the customer to approve.
Stage 4: Choosing the yarns
Labels are usually woven from polyester yarn because it's strong, washes well and holds its colour. Colours are picked from available yarn cones to be as close as possible to the specified Pantone shades. That's why woven labels talk about the "closest match" rather than an exact colour. Metallic and neon yarns are added as special colours.
Stage 5: Weaving on a jacquard loom
Woven labels are produced on jacquard looms. The industry uses both narrow looms that weave tapes and wide looms where many labels are woven at once as a single sheet. The warp usually carries the background colour while coloured weft yarns build the image. The jacquard mechanism lifts or lowers each warp thread individually according to the weave file, so the tape or sheet of repeating labels is built up row by row.
After weaving, the material may be finished further, for example calendered for a smoother surface or coated to reduce fraying and keep the label stable during cutting.
Stage 6: Cutting
The woven tape or sheet is cut into individual labels. There are a few main methods:
| Method | How it works | Result |
|---|---|---|
| Hot knife | A heated blade melts and seals the polyester | Sealed but firmer edge |
| Ultrasonic cutting | High-frequency vibration cuts and seals | Clean, softer edge |
| Laser cutting | A laser cuts free-form shapes | For non-standard outlines |
| Woven edge (narrow loom) | The label is woven with finished side edges | Softest edge along the length |
Sealing the edge matters: without it, a label starts fraying in the very first wash.
Stage 7: Folding and finishing
If the label has a fold, it's folded and pressed by machine: end fold, centre fold, mitre or more complex combinations. The fold hides the cut edge inside the seam and provides a seam allowance. Where needed, an iron-on adhesive is added so the label can be applied with a heat press instead of sewing.
Stage 8: Quality control and packing
Finished labels are checked against the approved sample for size, colours, text legibility, correct folding and clean edges. Faulty pieces are removed. The labels are then counted and packed, typically in bundles of a hundred or more.
Why the sample matters
Before production, many makers offer a digital proof and, when needed, a physical sample. Check it at real size, in daylight and next to the fabric, and keep comments specific: "thicken the letters by 10%" works better than "make it clearer".
Why minimums and lead times exist
- Loom set-up: loading yarns and the program takes the same time whether you weave 100 or 1,000 labels.
- Digitising: every new design needs a designer's work.
- Sample approval: the clock really starts once the customer approves.
That's why the unit price of woven labels drops sharply as quantity rises. If you only need a handful, a printed satin or canvas label may be a better place to start.
How to speed up your order
- Send a vector file and Pantone references.
- Decide on size and fold in advance.
- Approve the proof quickly and with clear comments.
- Plan labels together with your fabric, not at the last minute.
Labels made to your design
Bul-tex manufactures and supplies woven jacquard labels to the customer's design, as well as printed satin, canvas and metal labels. See examples in our labels collection and browse our accessories to finish your product. For a quote, send us your logo and sizes. To learn more about how trims are made, visit our manufacturing articles.