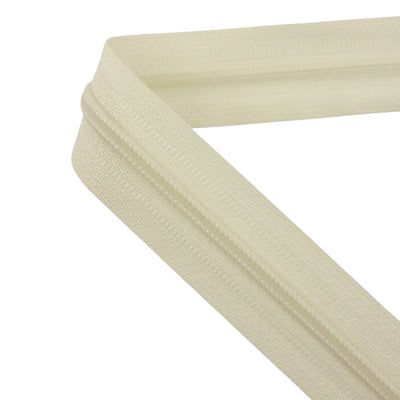
An invisible zipper, also called a concealed zip, is the neatest way to close a dress or skirt – from the outside you only see a seam, with no tape or teeth showing. Sewing an invisible zipper needs a slightly different technique from a regular one, but after the first try it becomes quick and predictable. Here's what you need and how to put one in, step by step.
What an invisible zipper is and how it differs
On an invisible zipper the coil sits on the inside of the tape. When closed, the two fabric edges meet and the zip disappears into the seam. It is almost always a No.3 coil – light and flexible – so it suits dresses, skirts, blouses and lightweight trousers. The pull tab is small and teardrop-shaped.
Unlike a regular zip, an invisible one is sewn in before the seam below it is stitched, onto open, unpressed edges.
 Beige invisible zippers #3 TAT TF031 – 4 8 and 49 cm closed-end
 Beige invisible zippers #3 TAT TF031 – 28 and 31 cm open-ended
 Spiral zippers black non-separable A001
Which length to choose
- Skirt: usually 18–22 cm.
- Dress with a side zip: 30–40 cm.
- Dress with a back zip: 40–60 cm, depending on the style and the wearer's height.
Buy a zipper 2–3 cm longer than the opening. The slider stops a few centimetres above the bottom stop and that part can't be stitched closely – if the zip is exactly as long as the opening, it won't open all the way.
What you need
- a No.3 invisible zipper in the fabric colour;
- an invisible zipper foot (ideal) or a standard zipper foot;
- pins or clips and an iron;
- 1–1.5 cm fusible interfacing tape for thin or stretchy fabrics;
- matching thread.
How to sew an invisible zipper – the steps
- Prepare the edges. Overlock or zigzag both seam edges. On fine fabrics, fuse interfacing tape along the zip line.
- Press the coil open. Open the zipper and, with a cool iron on the back, gently unroll the coil so the teeth stand up. This lets you stitch closer to them.
- Pin the first side. Place the open zipper right sides together with the fabric, coil on the seam line (usually 1.5 cm from the edge). The top stop sits about 1 cm below the neckline or waistband seam line.
- Stitch. With the invisible zipper foot, sew right next to the coil from top to bottom until you reach the slider. Stop 1–2 cm above it and backstitch.
- Second side. Close the zipper and mark the waist and seam levels on the other half so they line up. Open it again and stitch the same way.
- Sew the seam below. Close the zip. Switch to a regular zipper foot, pull the end of the tape aside and sew the seam from the end of the zip stitching downwards, starting 2–3 mm to the side and slightly above it.
- Secure the ends. Stitch the lower ends of the tape to the seam allowances so they don't flap.
Common mistakes
- Stitching too far from the coil – the zip shows instead of vanishing into the seam.
- Sewing the seam below the zip first – then you can't get close enough to the coil.
- Waist seams that don't line up – check with the zip closed before sewing the second side.
Frequently asked questions
Can I sew an invisible zipper without a special foot?
Yes, with a standard zipper foot, but sew slowly and hold the coil unrolled with your fingers. The dedicated foot gives a cleaner result.
Why is my invisible zipper showing?
Usually the stitching is 2–3 mm away from the coil instead of right next to it. Unpick, press the teeth open and sew again closer.
Can an invisible zipper be shortened?
Yes, from the bottom – hand-sew a new stop and cut 2 cm below it.
Explore our zippers for dresses and skirts and choose thread in a matching shade for an invisible finish.