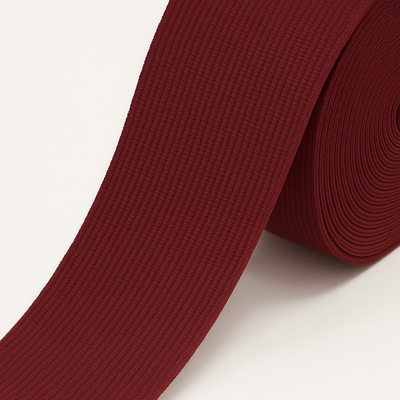
Shirring elastic is the secret behind gathered summer dresses, smocked tops and children's dresses with stretchy bodices. Several parallel rows of stitching with elastic thread in the bobbin gather the fabric and make it stretch, so you need no zip or buttons. It looks tricky, but with a properly wound bobbin and a few machine settings it usually works first time. Here is the full step-by-step tutorial, along with fixes for the most common problems.
What you need
- Shirring elastic: a thin rubber or elastane core covered in polyester, usually in white or black.
- Regular sewing thread for the needle: polyester, matched to your fabric. See our sewing threads.
- Lightweight fabric: lawn, voile, cotton double gauze, viscose, lightweight linen (around 80–150 g/m²). Heavy fabrics don't gather well.
- An empty bobbin, a ruler and chalk or a disappearing marker.
- A steam iron for the final shrink.


Step 1: Hand-wind the bobbin
Shirring elastic goes in the bobbin only, never through the needle. Wind it by hand without stretching it. If you wind it under tension, it will contract unevenly and the gathering will be unpredictable. Wind calmly and evenly until the bobbin is about 80% full. Some sewists wind it on the machine at the slowest speed while keeping the elastic slack, which also works as long as it isn't stretched.
Step 2: Insert the bobbin and check tension
Insert the bobbin as usual and bring the elastic up. Tug the end gently: you should feel slight resistance, but the elastic should feed freely. If your machine has an adjustable bobbin case, a slight tightening of the screw is sometimes needed to get enough gather. Note the starting position so you can return it afterwards.
Step 3: Set up the machine
| Setting | Value | Why |
|---|---|---|
| Stitch | Straight | Zigzag doesn't gather the fabric |
| Stitch length | 3.5–5 mm | Longer stitches gather more |
| Needle tension | Normal or slightly raised | Helps keep the elastic lying straight |
| Speed | Medium | Better control of the rows |
| Row spacing | 8–15 mm | Usually the width of the presser foot |
Step 4: Test first
Always sew a test piece of the same fabric first, at least 20 × 20 cm. Sew 4–5 rows and see how much it draws in. Typically the shirred area shrinks to roughly one half to two thirds of its starting width, so cut your piece 1.5 to 2 times wider than the finished measurement.
Step 5: Sew the rows
- Chalk the first row on the right side. Always sew right side up; the elastic stays underneath.
- Backstitch 2–3 stitches at the start and end of every row, or leave long tails to knot by hand.
- For each following row, use the edge of the presser foot as a guide against the previous row.
- As you sew, stretch the already gathered fabric flat with your hands so it lies flat under the foot. Otherwise the rows will wander.
- When working in the round (a dress bodice) you can sew a continuous spiral or separate rounds; for separate rounds, start each one on the same seam to hide the ends.
Tip: keep an eye on how much elastic is left. If the bobbin runs out mid-row, unpick back to the last full stitch and restart with a 2–3 cm overlap.
Step 6: Shrink with steam
Once all rows are sewn, hover a steam iron over the shirring without pressing down. Steam makes the elastic contract further, so the gathers turn dense and even. This step is often what turns limp shirring into a professional finish.
Troubleshooting
The fabric won't gather
- Lengthen the stitch to 4–5 mm.
- Slightly tighten the bobbin case or raise the needle tension.
- Check that you didn't wind the elastic under tension.
- Use steam, since many fabrics only gather properly afterwards.
- The fabric may be too heavy; switch to something lighter.
The elastic keeps breaking
- Shorten the stitch and reduce the bobbin tension.
- Look for burrs on the bobbin case or throat plate.
- The elastic may be old and perished, since rubber ages over time. Replace it.
Rows are uneven or wavy
- Stretch the fabric flat in front of the foot as you sew.
- Mark more guide lines.
- Sew more slowly.
The elastic shows on the right side
The needle tension is too low or the bobbin case is too tight. Raise the needle tension a step at a time.
Project ideas for shirring
- Summer dress with a shirred bodice: a rectangle of fabric shirred across the top in 10–15 rows, with thin straps. One of the easiest beginner projects.
- Off-the-shoulder top: 4–6 rows around the neckline hold it in place without a casing.
- Shirred cuffs: 3–4 rows at the end of a sleeve create a puff-sleeve effect.
- Children's dress: the shirring grows with the child, so the dress lasts more than one season.
The more rows, the denser and stretchier the area. A strapless bodice needs more rows packed closer together, around 8–10 mm apart.
When to use elastic tape instead
Shirring is perfect for light, decorative areas: bodices, cuffs, the waist of a summer dress. But if the area has to carry weight, such as a skirt waist in heavier fabric or a trouser waistband, use a flat elastic tape in a casing instead. It gives more power and lasts longer.
Caring for shirred garments
Wash at 30 °C and skip the tumble dryer. Heat is shirring elastic's worst enemy, and a dryer can bake it in a single cycle. Steam the shirred area rather than pressing it. You will find more advice on choosing elastic in our elastic articles. If you run an atelier and need supplies in larger quantities, drop us a line.