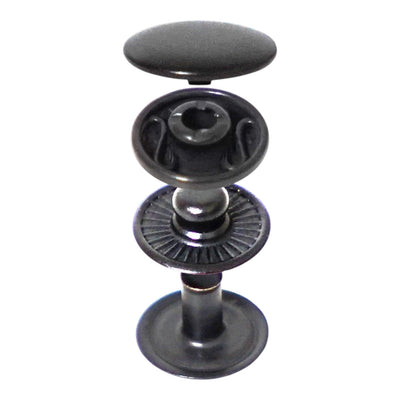
Custom logo metal buttons turn an ordinary garment into a branded product: customers recognise the mark even after the label has been cut out. Yet the process puts off many small brands. How many do I have to order? What does the mould cost? How long will it take? This article walks through the full journey from idea to delivery as it works in metal trim manufacturing, and explains why each step exists.
Step 1: The brief, or what we need from you
A good brief saves weeks. Prepare the following:
- Trim type: shank button, sew-through button, jeans tack button, snap fastener, eyelet or rivet.
- Size: in mm or ligne (1 ligne = 0.635 mm). For example 20 mm for a jacket front, 15 mm for a cuff, 17 mm for jeans.
- Logo as a vector file (AI, PDF, SVG) and the technique you want: relief, deboss or enamel.
- Finish: gold, antique brass, nickel, gunmetal, matte black. If you have a physical sample of the colour, send it.
- Quantity for the first order and expected repeats.
- Compliance requirements: for example nickel-free if the button touches skin, or lead limits for childrenswear.
- Deadline by which the trims must be ready.
 Metal buttons with logo 0076 Col 101926 – 18 mm with matte grey finish
 MC 1772 crest metal buttons – Gun Metal 20 mm with shank for suits and jackets
 Gold buttons MC 2110 Col E109 – 22 mm with crest for suits and coats
Step 2: Technical drawing or 3D model
From the brief we produce a drawing with dimensions, profile (flat, domed, rimmed), relief depth and logo position. Cast buttons often get a 3D render too. This is the moment for changes: altering the design after the mould is cut means a new mould.
Tip: check the drawing at 1:1 scale. Print it and lay it on the fabric. A logo that looks great on screen at 300% can be illegible at real size.
Step 3: Mould or die
Cast buttons need a steel mould; stamped ones need a die. As a rough benchmark, international manufacturers charge a mould fee in the region of 60–85 EUR for a metal button, and it is usually not charged again on repeat orders because the mould is kept on file. Complex 3D motifs or multi-cavity moulds cost more. The mould is a one-time cost, and the relief logo it produces is crisp and durable.
Step 4: Approval sample
Before bulk production, samples are made in the actual material and finish. Check:
- logo legibility at real size;
- finish colour in daylight and next to the fabric;
- size against the buttonhole, or against the press for snaps and jeans buttons;
- strength: pull, flex and fasten it 20–30 times;
- edges, which must not cut thread or fabric.
The approved sample, often called the golden sample, becomes the reference for the whole run. Keep it safe; it is your standard for every future order.
Step 5: Production
Typical materials for custom metal buttons are zinc alloy (for cast designs), brass and copper (for stamped ones), stainless steel and aluminium. Zinc alloy allows complex shapes and detail; brass resists corrosion better and is the standard for jeans buttons and eyelets. After casting or stamping, parts are deburred, polished and prepared for plating.
Step 6: Plating and finishing
Plating determines colour and much of the durability. Antique effects such as antique brass and antique silver are created by darkening and selective polishing. Enamel is applied after plating and then cured. If the button will be laundered often or worn on denim, ask about the finish's resistance to washing and abrasion.
Step 7: Quality control and packing
Every batch is compared with the approved sample for size, colour, logo and surface defects. Buttons are counted and packed by quantity and size so they are easy to handle on the factory floor.
Minimum order quantities (MOQ)
Across the industry, the typical minimum for custom metal buttons is around 100 pieces per design and size, and some manufacturers work from 50 pieces with fast sampling. Why is there a minimum at all? Because every run has fixed costs: machine setup, a plating bath, inspection. At 50 pieces those costs are spread over very few units and the price per piece rises. A practical approach for small brands:
- use one design in two sizes (front and cuff) rather than two different designs;
- choose a single finish for the first run;
- order 5–10% extra to cover factory rejects and future repairs.
Lead times
| Stage | Typical duration |
|---|---|
| Brief and drawing | a few working days |
| Mould and samples | 1–3 weeks |
| Your approval | up to you, and often the slowest step |
| Bulk production and plating | 2–4 weeks |
| Delivery | depends on the courier |
These timings are indicative and depend on complexity and quantity. Plan trims alongside fabric, not after it, so buttons are never the reason a collection ships late.
Repeat orders
Once the mould and the approved sample exist, a repeat order is noticeably faster and cheaper: there is no mould fee and no new approval unless you change the finish. Plating colour can vary slightly between batches, so for important collections ask for a sample from the new batch.
FAQ
Can I order snaps and eyelets with the same logo?
Yes, and it is common practice: one brand, one hardware language. See our snap fasteners and eyelets for the base models.
Who owns the mould?
The mould is usually stored by the manufacturer and used only for your orders. Agree the terms in advance.
Can I see stock designs before going custom?
Yes. Browse the metal buttons in our catalogue. Many brands start with a stock design and move to their own logo later.
Next step
Bul-tex manufactures and supplies garment trims and accepts orders for logo buttons for brands, ateliers and uniform programmes. Send us your logo, size and quantity through the contact form, and if you want to learn more about the techniques, read our other manufacturing articles.