A tagging gun is the fastest way to attach a hang tag to a garment – about a second per piece, no knots to tie. That's why it's standard in shops and warehouses that process hundreds or thousands of items. Used carelessly, though, it leaves visible holes in silk, broken loops in knitwear and unhappy customers. This step-by-step guide covers how to choose a gun and fasteners, where to shoot, and how to look after the tool.
How it works
The gun has a hollow, slotted needle that a plastic fastener travels through. Fasteners come on clips, typically 50 per clip, joined by a thin plastic runner. When you squeeze the trigger, the needle passes through the fabric, pushes the T-bar end of the fastener out the other side and snaps it off the clip. The other end stays on the tag side. The result is a strong plastic link that is snipped off with scissors.
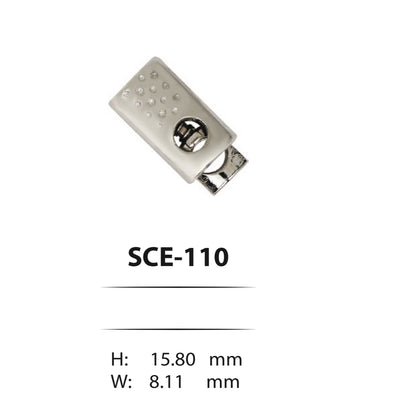
 Metal cord and elastic stoppers 110 – single hole (5 mm), dotted design
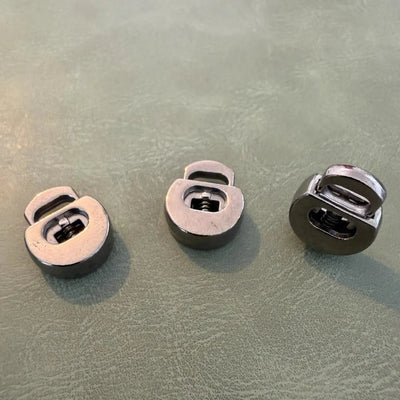
 Metal stopper E-2131 Gun Metal 1.5 cm – Single hole, Round padlock-style model
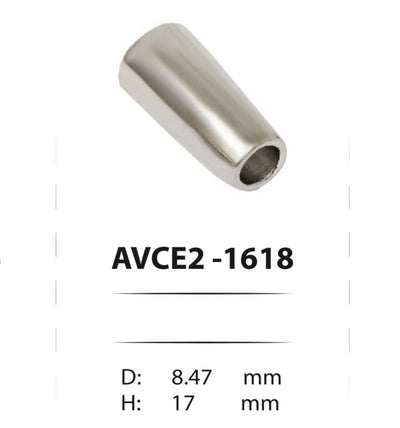
 Metal cord ends for cords and elastic bands 1618
Step 1: Choose the right gun
| Type | Needle | Best for |
|---|---|---|
| Standard | Thicker, sturdier | Denim, cotton, wovens, outerwear, towels, bags |
| Fine fabric | Thinner, leaves a smaller hole | Silk, chiffon, lingerie, fine jersey, shirts |
| Heavy duty | Strongest | Shoes, rugs, leather goods, very thick materials |
Important: standard and fine fasteners are not interchangeable. Fine fasteners are thinner and won't feed properly through a standard needle, and vice versa. Buy them as a matched set.
Step 2: Choose your fasteners
Types
- Standard fasteners – the everyday choice, with a T-bar at one end and a flat paddle at the other.
- Heavy-duty T-pins – thicker and harder to break; for heavy items and places where theft is a concern.
- Loop pins – form a closed loop; used to join pairs of socks, gloves or shoes.
- Fine fasteners – slimmer, for fine-fabric guns.
Length
Fasteners come in a range of lengths, from around 7 mm for very fine work up to 75 mm and beyond. As a rough guide:
- 15–25 mm – T-shirts, shirts, lingerie; keeps the tag close to the garment.
- 35–40 mm – the most versatile length for most garments.
- 50–75 mm – jeans, jackets, bags and thick materials, or when you want the tag to hang more freely.
Too short a fastener pulls on the fabric and can tear it when tugged; too long looks untidy and snags.
Step 3: Load the gun
- Remove the needle guard and keep the needle pointed away from your body.
- Slide the fastener clip into the channel on top of the gun until it clicks.
- Squeeze the trigger once without a garment to feed the first fastener to the needle.
Step 4: Where to shoot
This is the step that protects the fabric. The rule: never go through the main fabric if you can go through a seam or a label instead.
- The sewn-in label – the best spot. It's there anyway, and a hole in it doesn't show.
- Seam allowance – side seam, sleeve seam or underarm. The fabric there is doubled and stitched.
- Belt loop or waistband label – for jeans and trousers.
- Buttonhole – on shirts and jackets the fastener can pass through a buttonhole without piercing fabric.
- Lace eyelet – on shoes, through a metal eyelet or a strap.
Never shoot through
- Silk, satin, chiffon or fine jersey on the face of the garment – the hole stays visible.
- Leather and faux leather – the hole is permanent.
- Chunky knits – the needle can break a yarn and start a ladder.
- Waterproof fabrics and membranes – every hole is a potential leak.
For these items, use a string, a safety pin through the label or a loop around a button. You'll find hang tag strings and ribbons in our shop.
Step 5: Fire
- Thread the hang tag onto the needle through its hole.
- Push the needle through your chosen spot – the seam label or seam allowance – from the inside out if you want the fastener less visible.
- Squeeze the trigger fully in one smooth movement.
- Pull the needle straight back out without twisting.
Tip: keep your free hand well clear of the needle's exit point. The needle is sharp, and tagging-gun injuries are more common than people think.
Step 6: Changing the needle
Needles go blunt and bend over time. A dull needle tears yarns instead of parting them, so replace it at the first sign of trouble.
- Remove the fastener clip.
- Slide or rotate the needle lock at the front of the gun, depending on the model.
- Pull out the old needle and dispose of it safely – in a rigid container, not a bin bag.
- Insert the new needle with its slot facing the fastener channel until it seats.
- Lock it and test-fire without a garment.
Troubleshooting
- The fastener won't come out: the clip isn't fully seated, or the fasteners are the wrong type for the gun.
- Fasteners break inside the needle: a bent needle or a slot facing the wrong way. Replace the needle.
- It leaves a big hole: switch to a fine-fabric gun and fine fasteners, or go through the label.
- The gun jams: clear out stuck bits of plastic and check that the lever returns freely.
- Tags tear off in transit: the board is too thin or the fastener too short. Choose a heavier board or add an eyelet.
Tagging gun or string?
The gun wins on speed and cost at volume; string wins on feel and fabric safety. Many brands use both: fasteners for core basics and string or ribbon for the premium line.
Bul-tex manufactures and supplies garment trims – labels, strings, ribbons, metal hardware – and accepts custom orders for brands. For questions about labelling your collection, get in touch. More practical guides are in our manufacturing section.