An adjustable strap slider is the small piece that turns a good bag into one that fits everyone: worn on the shoulder, across the body or short under the arm, all with one slide. The mechanism is simple, but there is one point where nearly every beginner goes wrong, which is the order in which the strap passes through the slider and rings. This guide walks through it step by step, calculates the strap length and explains how to choose hardware and material.
What you need
- Strap material: woven webbing (polypropylene, polyester, cotton) or a leather strap. 25 mm (1") wide for most crossbody bags, or 38 mm (1.5") for larger bags and backpacks.
- 1 slider (tri-glide): a rectangular frame with a centre bar and the same inside width as the strap.
- 2 rings: D-rings or rectangle rings sewn to the bag. If you want a removable strap, attach the strap ends to 2 swivel hooks instead of sewing them to the rings.
- Strong polyester thread, a heavy-duty machine needle, pins or clips.
The golden rule: the inside width of the slider and rings must equal the strap width or be 1–2 mm larger. Narrower hardware bunches the strap; wider hardware lets it slide.
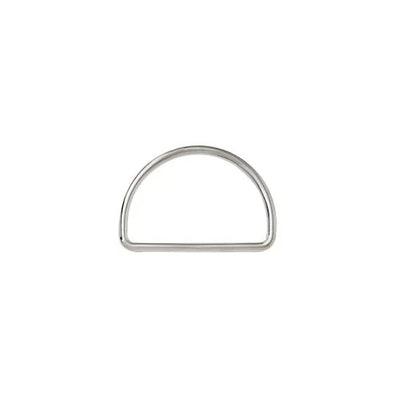
 Metal half-rings – PMR 0002 round
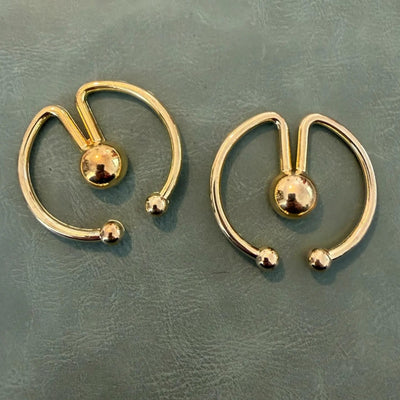
 Metal Rings E-1917 Nickel – Open design with beads, Designer – 4.5 cm
 Lightweight metal rings 092060 Col 0144 – 3.3 cm Gun Metal
Why the slider needs a centre bar
A slider works by friction. The strap wraps over and under the centre bar and pinches against itself, and the heavier the load, the tighter it grips. That is why a rectangle ring without a bar cannot replace a slider: the strap would slip at the first bit of weight. On metal sliders the bar is often slightly ridged or knurled for extra grip.
Calculating the length
With a slider, part of the strap is always doubled; that is your adjustment reserve. So the strap material is longer than the maximum finished strap length.
A simple formula:
- Total strap length ≈ desired maximum length + 10 cm (minimum overlap in the slider) + 2 x 4 cm (to fold and stitch the ends).
- The shortest setting of the finished strap will be roughly half the total strap length.
Example for a crossbody bag with a 130 cm maximum: 130 + 10 + 8 = 148 cm of webbing. The shortest setting will be around 70 cm, enough to wear the bag on the shoulder. A shoulder-only bag with a 110 cm maximum needs roughly 128 cm.
Strap length is measured from ring to ring, not from the edge of the bag. Measure on yourself with a tape measure or a length of string while holding an empty bag where you want it to sit.
Step by step: fixed adjustable strap
Labels: ring A and ring B are on either side of the bag; the slider is S.
- Seal the ends. If the webbing is synthetic, heat-seal the ends with a lighter so they do not fray. For cotton tape, fold and stitch.
- Attach the first end to the slider. Thread one end through the slider around the centre bar: up through one opening, over the bar and down through the other. Fold the end back 3–4 cm and stitch it close to the bar with a box stitch (a rectangle with an X).
- Pass the free end through ring B. Thread it from outside to inside so the right side of the strap stays facing out.
- Go back to the slider. Feed the free end through the slider again, through the two outer openings, over the stitched end and over the centre bar. This is where most mistakes happen: if the strap goes under the bar, the adjustment will not hold.
- Check for twists. Lay the strap flat; it should not be twisted anywhere along its length.
- Attach the second end to ring A. Pass the end through the ring, fold back 3–4 cm and box stitch.
- Test. Slide the slider to both extremes. Hang the bag with 2–3 kg inside and check that the strap does not slip.
Variation: removable strap
For a detachable strap, sew both strap ends to swivel hooks instead of directly to the bag's rings. The sequence is the same: end 1 around the slider bar; free end through hook B; back through the slider; end 2 to hook A. The hooks then clip onto the bag's D-rings.
Webbing or leather?
| Material | Pros | Adjustment notes |
|---|---|---|
| Polypropylene webbing | Light, inexpensive, does not absorb water | Can slip more easily; choose a slider with a ridged bar |
| Polyester or nylon webbing | Very strong, smooth | Holds excellently in a metal slider |
| Cotton webbing | Soft, natural look | Holds well but stretches slightly over time |
| Leather, 2–3 mm | Luxurious look | Needs a slider with a deeper opening; for thick leather use a buckle |
With leather straps, a slider only works if the leather is thin and supple. For thick, stiff leather a buckle with holes is the better option.
Common mistakes
- Strap threaded under the centre bar instead of over it, so the slider does not grip.
- A twisted strap that rolls on the shoulder.
- Too little overlap (under 5 cm), so the strap pulls out of the slider at full length.
- Straight-stitch-only attachment that concentrates the load and breaks. Use a box stitch.
- Mixed finishes, such as a gold slider with nickel rings.
Hardware from Bul-tex
Our rings collection includes metal rectangle rings, round rings and half rings, plus a metal ring and slider set for narrower straps. More parts, including buckles, rivets and closures, are in the accessories section. For a full overview of every metal part a bag uses, see our accessories articles. If you make bags in runs and need sliders in a specific width and finish, contact us.